Importing Census Information
- Login to benefitsCONNECT®.
- Click on Company Administration.
- Click on Edit Company.
- Select the company by clicking on the name.
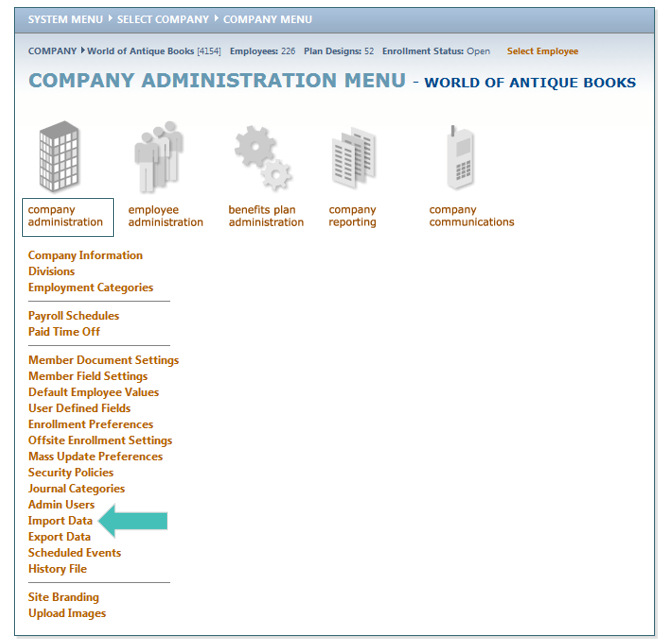
- Click on Company Administration. Click Import Data.
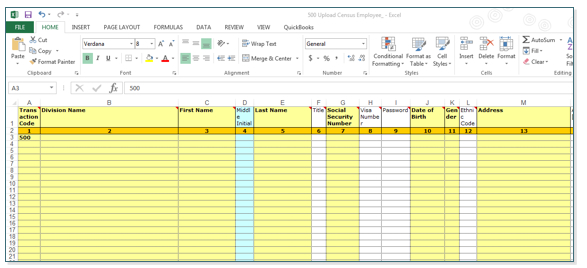
- From your files, open the census that you will be importing.

Census

- Make sure the following required fields have data in them prior to importing the spreadsheet (these are the yellow columns on the spreadsheet).
- On the fields that are not required or that you have no information for, make sure to insert a ~ in those field.
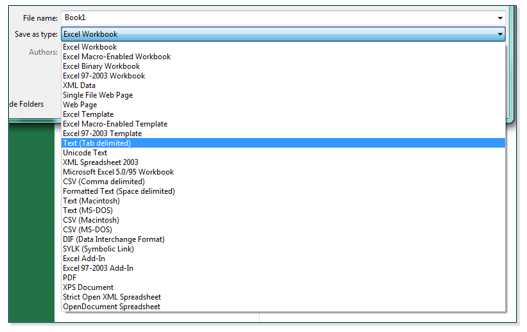
- You will need to save your Excel spreadsheet as Text (Tab delimited) to upload.

- Once the census is completely filled out, you are ready to Import the spreadsheet.
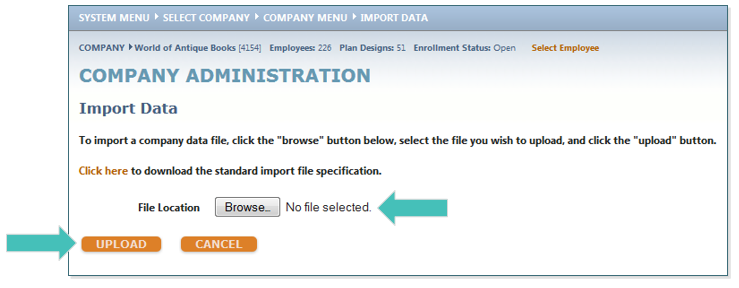
- Click on Browse. Find the file on your computer. Click UPLOAD.

TIP: If errors occur, go back to the spreadsheet and locate the error based on the error line that is given.
- You will receive a message saying, the following records were successfully imported, once the file was imported. Then click BACK.
Updated less than a minute ago
