Assigning User Defined Fields
-
Login to benefitsCONNECT® through https://enroll.benefitsconnect.net. You will use the same ID and Password for Marketplace as you will for benefitsCONNECT®.
-
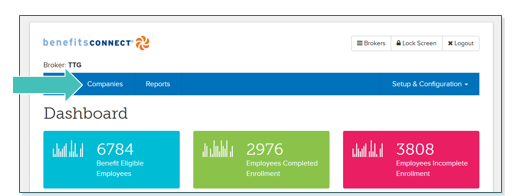
Click on Companies and a list of your Employer Groups will be shown. Then select the company you wish to view from the list provided. Alternately, if your list of employer groups is large, click Search after selecting Companies and enter in the company name into the appropriate field and click Apply.

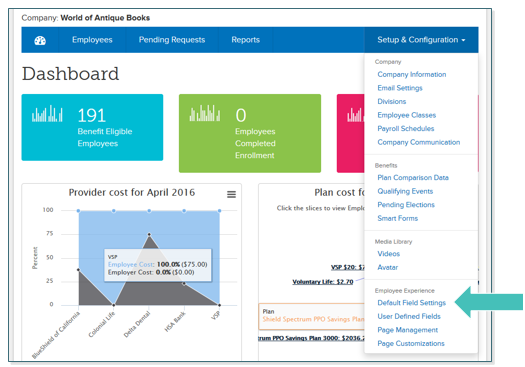
- Click on Setup & Configuration, and from the drop-down menu select User Defined Fields. In this example, we will assign verification of spouse employment to the employees profile page.
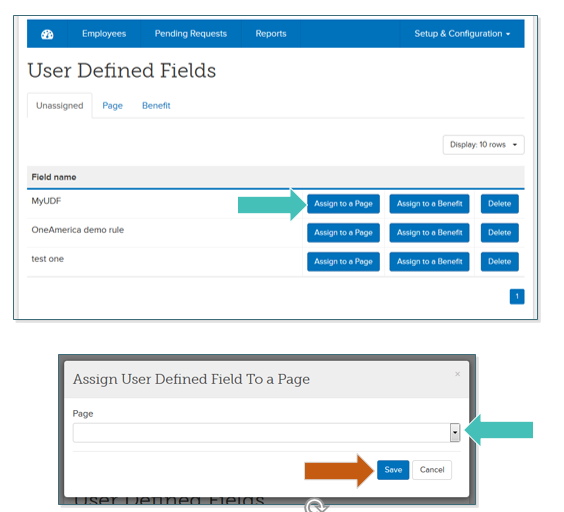
- Click on Assign to a Page.

- Click on Assign to a Page. Using the dropdown box under Page, select the page you would like to assign the UDF.
- Click Save.

TIP: Assign a Page will add the UDF on a specific page, whereas, Assign to a Benefit will add the UDF on a benefits level, such as spouse employment questions on a medical plan.
Updated less than a minute ago
