Employee Terminations
- Login to benefitsCONNECT®.
- Click on Company Administration.
- Click on Edit Company.
- Select the company by clicking on the name.
- Click on Employee Administration.
- Click Edit Employee.
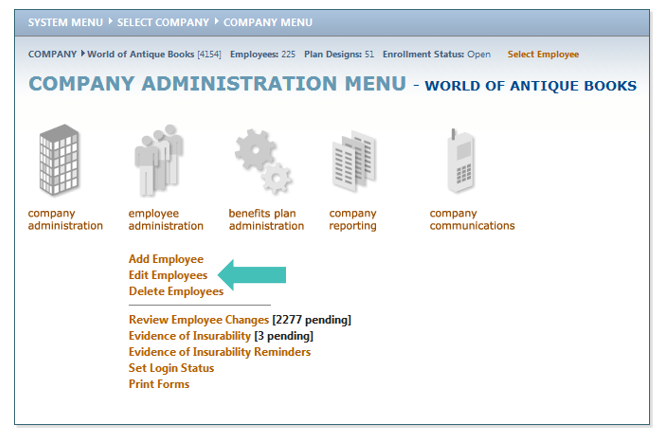
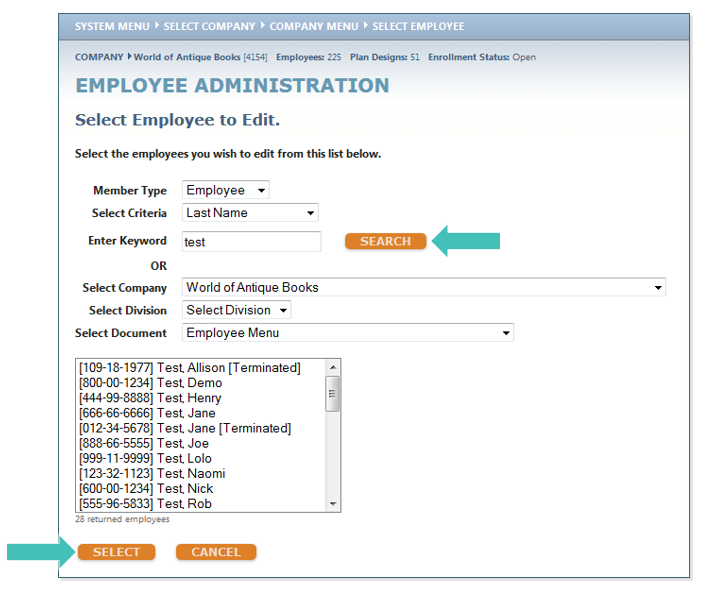
- Search for the employee you would like to terminate by entering their Last Name and clicking SEARCH.
- Highlight the employee name (if more than one employee with the same keyword exists), click SELECT.
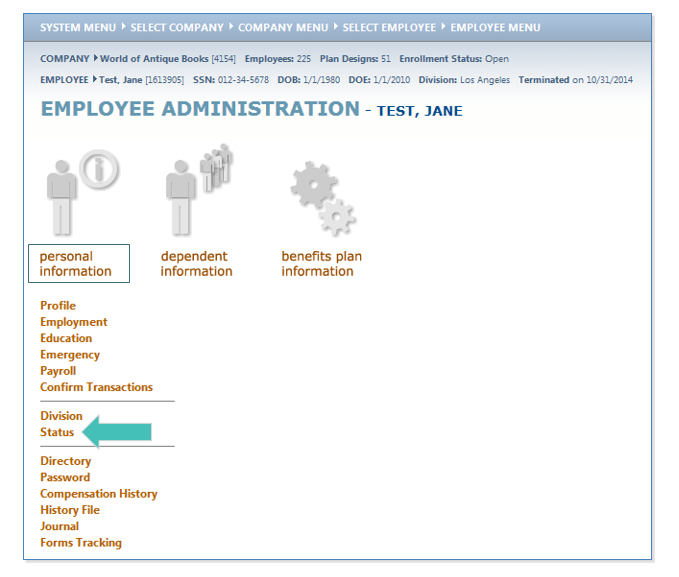
- Under the Employee Administration menu, click on Personal Information.
- Click Status.
- Change the field, Employee Employment Status is currently to Terminated.
- Change the Employee Billable information to Yes
- Change the Reason for Status Change to the appropriate option.
• If you select Other, enter the reason on the field marked Other.
• You can enter any additional notes regarding the status change in the Status Change Notes box. - Enter the Status change Effective Date (this is the date of termination).
- Enter the Final Payroll Date.
- Enter the System Access Expiration Date (this should be the date of termination).
- Change the Employee Login Status from Incomplete to Complete.
- Change the Employee Login Disabled to Yes. This will disable the employee’s login access preventing them from entering in the system.
- Click SAVE.
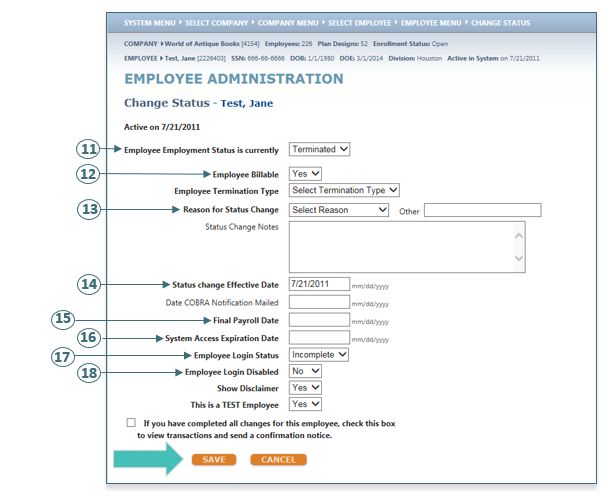
TIP: There is no need to enter the Date COBRA Notification Mailed as the system will automatically update this information.
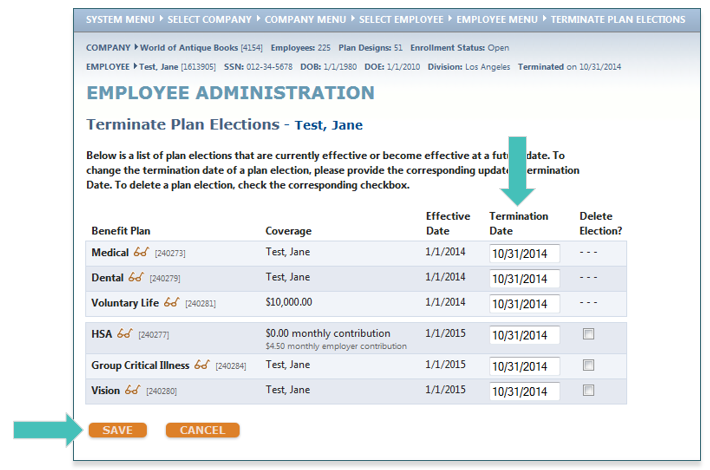
- A pop-up box will appear to terminate the employee’s benefits. Click OK.
TIP: If CANCEL is clicked, the employee will be terminated from employment, but will remain enrolled in benefits.
- The Termination Date will pre-populate. If you need to adjust the date, enter it under the Termination Date (for each specific benefit).
- Click SAVE.
Updated less than a minute ago
