Adding A User Defined Field (UDF)
- Log into benefitsCONNECT first and create the User Defined Fields. Please see https://release-notes.readme.io/v1.0/docs/user-defined-fields for instructions.
TIP: benefitsCONNECT® and bCEnroll communicate with one another. It is important that the initiation of the UDF (User Defined Field), be captured in benefitsCONNECT® first. This will mitigate any improper field mapping due to elements that may not be supported within either applications.
- Log into bCEnroll as a company administrator/system administrator by going to the following website: https://enroll.benefitsconnect.net
- Click on Companies and a list of your Employer Groups will be shown. Then select the company you wish to view from the list provided. Alternately, if your list of employer groups is large, click Search after selecting Companies and enter in the company name into the appropriate field and click Apply.

- Click on Setup & Configuration, and from the drop-down menu select User Defined Fields.
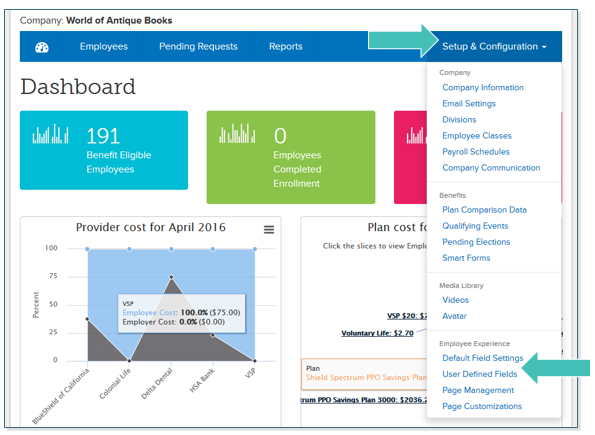
- Once you are in User Defined Fields, you should see the UDF you created in benefitsCONNECT under the Unassigned tab:
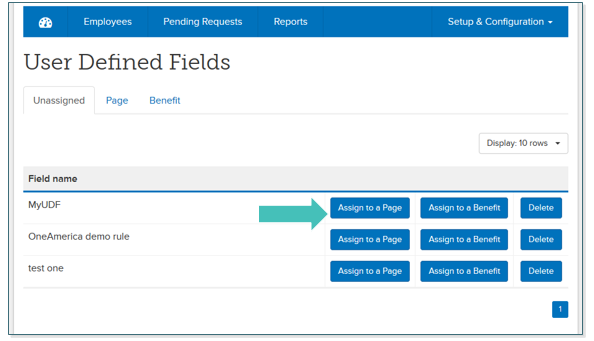
- Select the assign button according to your business needs. Assign to a Page or Assign to a Benefit.
- For this example I have clicked on Assign to a Page since the UDF for this example was assigned to the Spouse Information page in benefitsCONNECT.
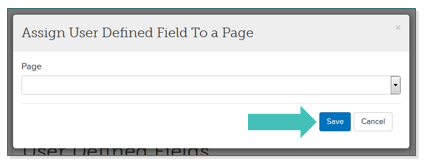
- Once inside the Assign to a Page dialogue box, you will need to choose which bCEnroll page you would like to display your UDF. There are five page options: Welcome, Consolidated Enrollment, Personal Information, Emergency Contact, Dependents/Beneficiaries. Select the option of your choice and click Save.
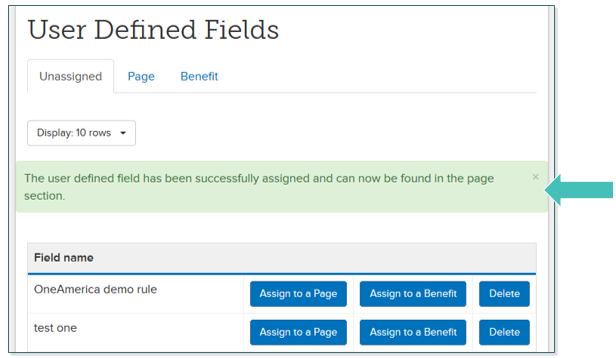
- Once saved you will be taken back to the original UDF page, and your UDF will now appear under the UDF category tab (Page or Benefit) you selected. You should also see a green notification Successfully Assigned confirming your previous assign action.
- Proceed to the tab that you assigned it to, and click Edit.
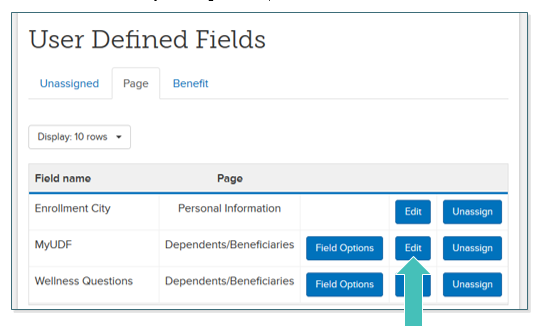
- Once you are in the Edit menu confirm all the values/settings are correct for the UDF. Please note that when creating a UDF for a dependent/beneficiary it is at this point in the process where you MUST assign the Subpage for the UDF. See screenshot below:
- Once you have verified your UDF settings, click Save. You will be taken back to the original UDF page, and will see a green confirmation Successfully Saved as an indication of completion.
Updated less than a minute ago
